Español
 عربى
عربى русский
The main application scenarios of CAT3 keystone jack include the following categories:
Phone system: CAT3 keystone jack are widely used in telephone networks to connect and terminate telephone cables and provide connections for voice communications.
Small office/home office (SOHO) network: In a small office or home office environment, CAT3 keystone jack can be used to support basic voice communications and low-speed data transmission needs, such as 10Mbps Ethernet networks.
Residential applications: In residential environments, CAT3 keystone jack are often used to connect telephone lines to provide stable telephone services.
Low-speed data networks: For applications that do not require high-speed data transmission, such as the old 4Mbps token ring network, CAT3 keystone jack are still applicable.
Industrial and commercial applications: In the industrial and commercial fields, CAT3 keystone jack can be used to connect various devices, such as computers, business equipment, and consumer electronics, to provide reliable voice and data transmission.
Alarm system: CAT3 keystone jack can also be used to connect sensors, control panels and other equipment of the alarm system to ensure reliable security communications.
HVAC and HVAC control: In heating, ventilation and air conditioning (HVAC) systems, CAT3 trapezoidal jacks can be used to connect sensors and control devices to achieve signal transmission in the system.
Upgrading of old buildings: In some old buildings, CAT3 trapezoidal jacks are still used to maintain existing wiring systems due to cost considerations, especially when there is no need to upgrade to higher category cables.
These application scenarios show that CAT3 trapezoidal jacks have wide application value in environments that require low-cost, low-speed data transmission and voice communication.
What are the installation methods of CAT3 trapezoidal jacks?
The installation methods of CAT3 trapezoidal jacks mainly include the following:
Wall mounting: First mark the installation location on the wall, and then use an electric drill to drill a hole at the mark. The hole diameter and depth depend on the specific mounting part. For example, some installation methods require a drilling diameter of 13mm and a depth of 65mm. Next, fix the bracket or pendant to the wall through the expansion tube and rotate it in the indicated direction.
Bracket installation: Similar to wall mounting, but the bracket is installed instead of hanging directly on the wall. The steps include marking the mounting position on the bracket, drilling holes, and then inserting the bracket into the drilled holes and fixing them with bolts.
Installation with self-tapping screws: For hard base walls, self-tapping screws need to be used with expansion tubes; for soft base walls, self-tapping screws can be used directly. When installing, install the trapezoidal screws on the host, then insert the tail wire into the wiring strip, then align the trapezoidal screws installed on the host with the socket above the bracket, and finally hang the host on the bracket and tighten the countersunk screws.
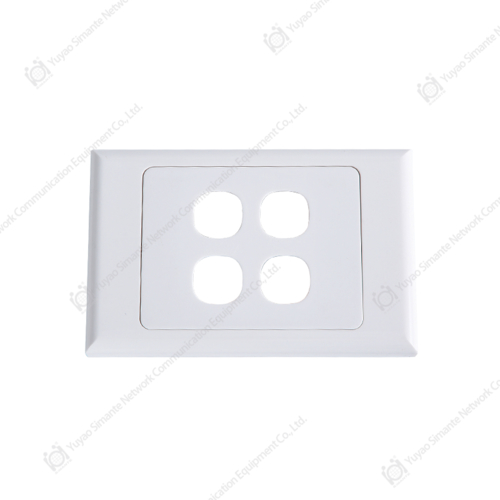
Modular installation: During the installation of the patch panel, it is usually necessary to first select the socket base plate or bracket, draw the outline, then cut according to the outline, and drill the initial holes in each corner. After that, use a bolt hole saw or wire saw to cut between the holes until the holes are opened.
At this time, the socket can be installed on the wall. If the socket is installed in a box, bundle the cable and pass it through a slot in the box. Next, use the wire punching tool to punch the twisted pair on the jumper module according to the color code on the jumper module, and fix it on the jumper module box. Finally, push the box into the wall opening and tighten the screws on the top and bottom of the box to make the box fit tightly with the wall.
Installation of ladder cable rack: When installing a ladder cable rack, first determine the installation location and length, and prepare the required tools and materials. Then, punch holes on the wall and fix the brackets, install the cut main beams and keep them horizontal, install the cut cross beams and keep them parallel, and adjust the step spacing according to the cable diameter and quantity. After completing these steps, check and adjust to make it firm, flat, and beautiful.
Installation with connectors: When installing ladder shelves, the installation of the connectors is the key step. Don't be too entangled in the alignment of the holes during installation, because the holes may not be accurate enough, and the connectors can be installed smoothly by slight adjustments and tapping.
Next, use a screwdriver to rotate the connector to ensure that it is firmly fixed in the hole. The video also shows how to deal with the tiny gap between the connector and the hole, ensuring that the connector is flush with the outside after installation.